Showing posts with label Birthday Cake. Show all posts

Monday, July 6, 2015

Cotton Cake 棉花蛋糕

Another simple recipe founded. This recipe was shared by my youngest sister from the web few days ago. Well, since my house is out of bread and cakes today so I've decided to give it a try this morning. During the process I'm a little nervous because lately whenever I bake or steam a cake, the outcome is terrible! So this recipe was handle with careful hands and I've been reading the ingredients again and again just to make sure I don't miss out anything...haha!
Carefully transferred the cake out from the oven and patiently waited for the cake to cool before cutting...oh the whole process is killing me! Guess I'm too tense after all...;p

Oh the result is wonderful....I'm speechless after giving it the first bite. I just LOVE it!!


Please refer to the original recipe which also in Mandarin here
Btw, I've make some changes in the recipe and posted here for my own reference..^^


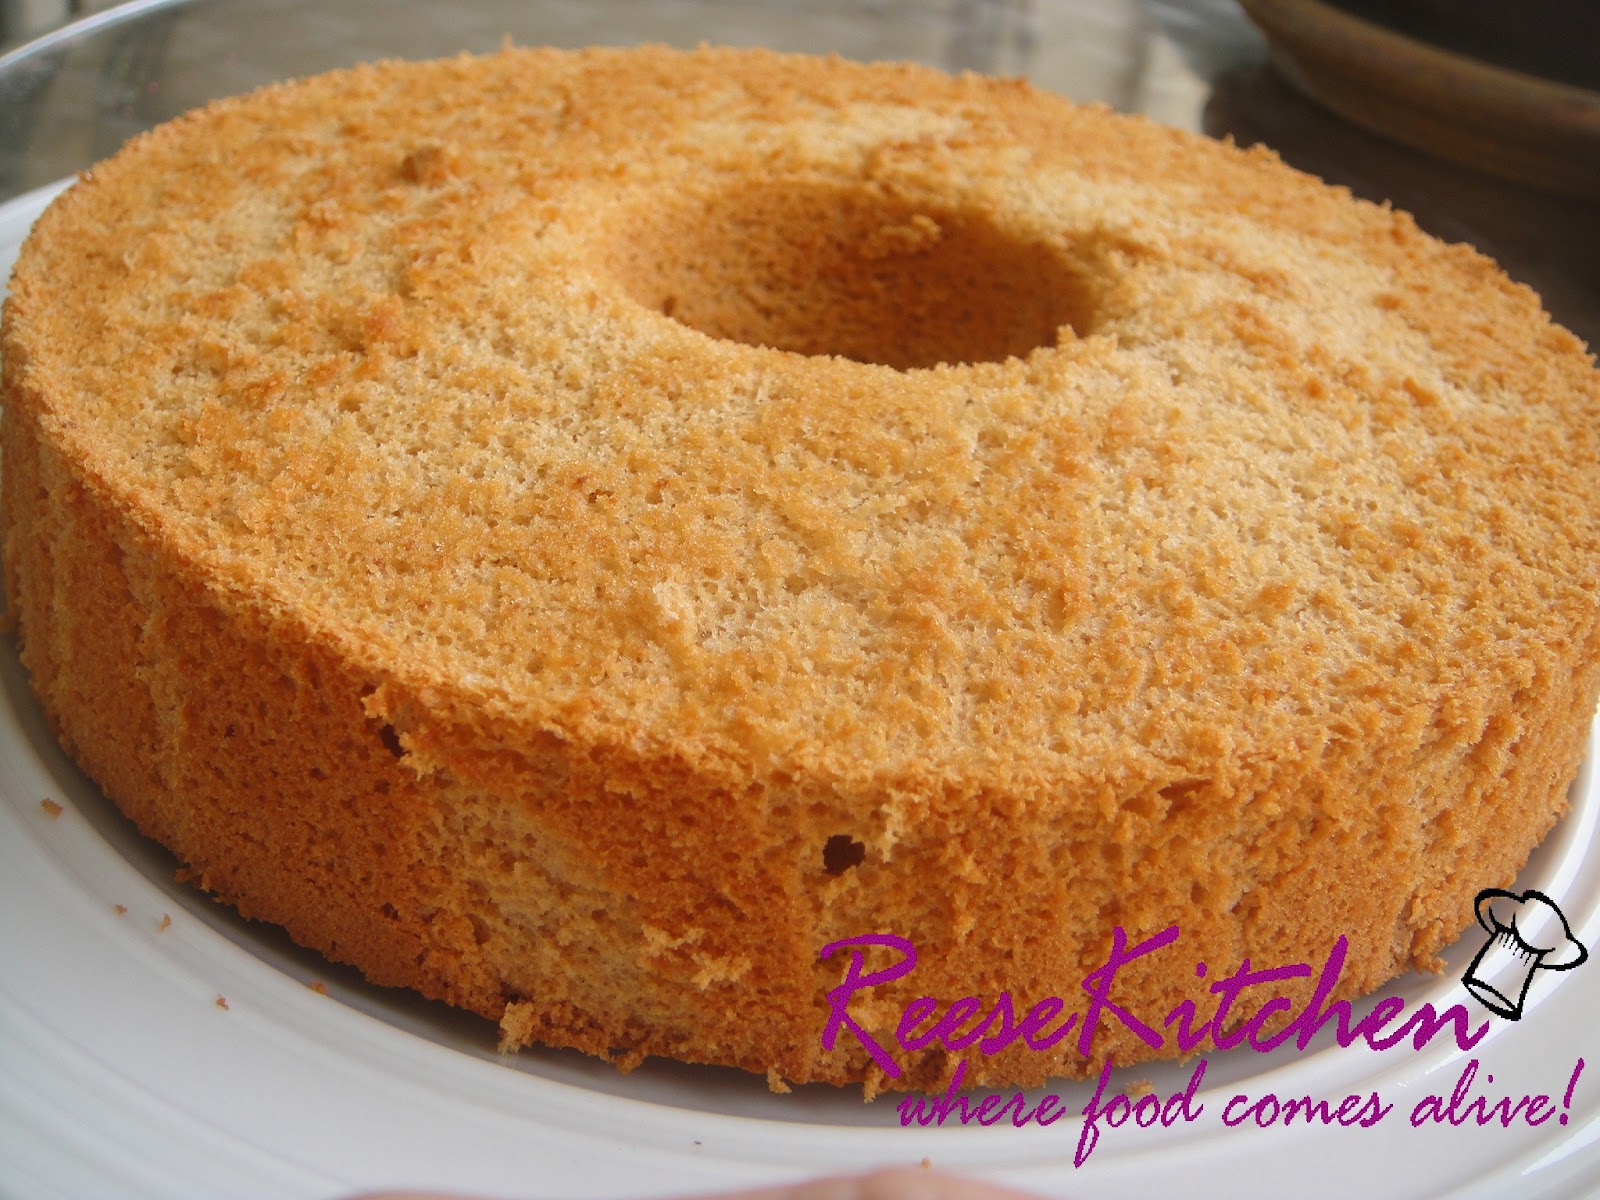
Recipe for a 9" round ring pan

Ingredients:
60g butter
80g superfine cake flour
1 whole egg (grade A)
4 egg yolks (grade A)
80ml full cream milk
1 tsp lemon juice

4 egg whites (grade A)
85g fine sugar

Method:
* Wrap the cake pan (outside) with aluminium foil to prevent water going in while baking.
* Prepare a tray of hot water for double bake
* Melt the butter over a double boiler. Remove from heat and cool slightly.
* Sift in flour and mix well with an egg whisk.
* Add in 1 (whole) egg and mix well. Then add in the egg yolks one at a time, mix well.
* Add in milk and lemon juice and mix well. Keep aside.
* Whisk the egg whites with sugar till soft peaks formed.
* Gently mix well the egg whites mixture with the egg yolks batter and pour into prepared pan.
* Steam bake at 150'C for 1 hour then increase temperature to 160'C for another 5 minutes.
* Remove from the oven and let sit for 5 minutes before removing the cake from the pan.
* Cool completely before cutting.


Here, have a look how soft and light is the cake! The texture is moist and fluffy and I think it's good to have it plain without any cream or jam. If you like the Japanese Cotton Cheese Cake, then I'm sure you'll love this! Give it a try and let me know about it...:))


Happy Baking!!!

Monday, April 6, 2015

Coffee Walnut Cake

I'm craving for cakes lately. Thinking to make this coffee walnut cake weeks ago, and finally I made it...haha! Somehow eating alone if no fun, will bring some to my friend later to share...hehe!
Well, well....there's still a lot to learn for my piping skills. (there were untidy...I know) 
Anyway, they taste good!!! 
Walnut sponge with Coffee cream...fantastic! Who will resist such heavenly combo..huh?!


Ingredients for Walnut Sponge:
5 large egg yolks
20g sugar
80g fresh milk
45g corn oil
100g cake flour
15g corn flour
120g walnuts (pounded)

5 egg whites
70g sugar

* approx. 10 walnut halves (toasted~ to decorate)


Ingredients for Coffee Cream:
250g icing sugar
100g soft unsalted butter
1 tbsp espresso powder dissolved in 1 tbsp boiling water
 Method:
~ Prepare a 9" round pan lined with parchment paper. Preheat oven at 180'C.
~ Whisk egg yolks and 20g sugar with by hands then add in oil and milk, stir well.
~ Add in flour and pounded walnuts and mix well. Set aside.
~ Beat the egg whites and sugar at high speed till soft peak forms.
~ Divide beaten egg whites to 2-3 portions to mix into the egg yolk mixture.
~ Fold in 1 direction until all egg whites are well mix with the egg yolk mixture.
~ Pour into prepared tin and bake at 180'C for 30-40 minutes.
~ Cool for 5 mintes then remove sponge from the tin and let cool completely.
~ While cooling the sponge, prepare the cream by beating the icing sugar with butter till smooth then add in coffee liquid and mix well.
~ Halved the sponge then cut into shapes with a round cutter (or any cutter you desire)
~ Sandwich the sponge with some cream, then cover the cake with cream.
(I covered the cake by piping the cream with nozzle no.21)
~ Decorate with toasted walnuts.
~ Keep in fridge before serving.


It's so nice to have something that you like and yet you can bake it by yourself. I am bless with my little skills that I can bake anytime anywhere I want to...:))
Hope you'll like this too!!


Happy Baking!!

Monday, August 18, 2014

Super Moist Chocolate Cake

Back to my cake post...;p
If you are a chocolate lover, this is a good one for you. Smooth and rich with chocolate cream...VOILA! A super moist chocolate cake for the beginning of the week. 

A fudge cake covered with chocolate cream and mouth watering moist texture of the cake, this is so far a good one after all the chocolate cake I've tried.
It has occupied the first position in my top 10 best chocolate cake now!


 Ingredients for the cake:
1 1/3 cups warm water
3/4 cup Belgium cocoa powder

1 3/4 cup cake flour
2 tsps baking powder
1/4 tsp fine salt

3/4 cup butter
1 1/4 cup castor sugar
3 eggs (size B)

Method:
~ Combine cocoa powder with warm water. Set aside.
~ Mix all dry ingredients in a bowl.
~ Beat butter and sugar till light and fluffy.
~ Add in eggs, one at a time.
~ Add dry ingredients mixture alternately with cocoa mixture. Always start and end with dry ingredients.
~ Pour into prepared tin. (3 small rectangular loaf tins or a 9" round pan)
~ Bake at 180'C for 30 minutes or until done.


Ingredients for the frosting:
110g Hersley's cooking chocolate bar (semi-sweet with 65% cocoa)
4 tbsps cornflour
1 tbsp condensed milk
1 1/2 cup fresh milk
2 tbsps butter

Method:
~ Mix the above ingredients in a saucepan and cook over a double boiler till spreading consistency.

Cool the cake and cover with frosting. Best serve with a cup of long black (my favourite)..haha!
Don't worry about the sugar or the condensed milk used here, the sweetness of the cake is just nice.


Cheers!


Monday, July 21, 2014

Mixed Berries Yogurt Cake


Looks who's posting here!! Yeah...I'm back on the track!
When was my last post? A year ago? Oh my.....;p
First in 2014...haha! A simple and yummy cake, Mixed Berries Yogurt Sponge.


Ingredients for the sponge:
6 egg yolks
20g sugar
60g fresh milk
45g cornoil
100g low gluten flour / cake flour
15g corn flour

6 egg whites
70g sugar
 Ingredients for the yogurt cream:
50g fresh rapsberries
50g fresh blackberries
100g plain yogurt
300g fresh cream (whipped)

Method:
~ Beat egg yolks together with sugar until well mix.
~ Add in fresh milk, cornoil and stir well. Then followed by cake flour and corn flour. Mix well and set aside.
~ Beat egg whites with sugar until stiff.
~ Mix egg whites into egg yolk batter and mix well slowly.
~ Pour into two 6" round pan and bake at 180'C for 25-30 mins.
~ Cool the sponge and split into 2 layers for each sponge.
~ Blend the berries together with yogurt and mix into whipped cream.
~ Spread yogurt cream on sponges and sandwiched them.
~ Cover the cake with plain whipped cream if you prefer and decorate with your own desire.


Chill before serving. The taste was good and the cream was like ice-cream. It didn't stay long in my fridge, guess this is a good recipe that adores by my family.
I'll try to bake more!!

Monday, July 29, 2013

Lemon Cupcakes with Coffee Cream


It has been quite a long time since last post, huh?! Yup...getting lazier and lazier with anything creative but at least I do bake all the old recipes again and again. Well, time flies and its the end of July, school holiday will starts soon and I'm going to enjoy this coming holiday to the fullest...:)
Here, a simple recipe that I've got from  the 200 cupcakes by Joanne Farrow. I modified the recipe to suit my taste.


Ingredients:
125g butter
120g sugar
2 eggs
2 tbsps lemon juice
1 tbsp lemon rind
150g self raising flour
1/2 tsp baking powder
50g almond flakes

Cream:
2 tbsps Coffee paste
100g cream
50g sugar
1 egg yolk


Method:
~ Cream butter and sugar till fluffy then add in eggs and stir well.
~ Add in lemon rind and lemon juice and mix well.
~ Add in flour and baking powder and mix well.
~ Spoon into prepared cups and sprinkle the almond flakes on top of the cupcakes. Bake in the preheated oven at 180'C for 20 minutes.
~ Meanwhile melt the sugar, cream and coffee paste in a bowl (double boil), add in egg yolk and off the heat. Stir well and beat the mixture to a snooth texture, shown below.
~ Transfer the smooth cream into a piping bag then slowly pump the cream into the cool cupcakes from the center.
~ Chill the cake before serving.


Try this simple recipe for your light tea break, I'm sure you'll like it.
The texture is so soft with the zest of lemon taste. You can always ignore the coffee cream if you like, the cupcakes are as tasty as they look.


CHEERS!

Monday, June 24, 2013

Butter Banana Cake

Hey there, how are everyone doing? We are facing a seriously hazy weather in Malaysia. Hope everyone is alright and take care, especially the young kids, old folks and expected mothers. Drink more water, take more fruits and vegetables and stay indoors as you can.
Bake some simple yummy cakes for tea or breakfast like what I just did.....^^


Ingredients:
250g butter
180g sugar
3 eggs
300g bananas (mashed)
1tbsp lime juice
300g self raising flour
4 tbsps milk powder


Method:
- Mix the flour and milk powder together.
- Beat butter and sugar till light and pale.
- Add in eges one at a time.
- Add in masged bananas , mix well.
- Add in lime juice follow by the flour mixture at low speed.
- Pour mixture into a 9" ring pan and bake at 160'C for 45 minutes.
 Texture was very good, it stays soft up to 3 days. I like this so much compare to those with cornoil.
My family loves this recipe and they even ask me to bake again!!


From the pictures above you can see the texture clearly, soft and fluffy right?
Oh...the side was crispy too, of course getting softer another day but it still good!
Hope you all like this too!!


Cheers!!

Monday, September 10, 2012

Coffee & Rum Chiffon

My baking mood has come back...hehe! Anyway instead of baking I still have some new interest too. I've started to paint and even started my dancing lesson which I wanted to learn long long time ago! Sounds busy huh?!!...I love all of these!!

Here, a chiffon cake..a small one actually. It's for just for a tea time snack last 2days ago. Well, I did share 2 pieces with my dear friend, only 2 small pieces...LOL!!


The texture was so good, soft and fluffy just like cotton. Love it!!

Recipe:
1 tbsp coffee powder
1 tsp rum
30ml fresh milk
2 egg yolks
20g sugar
20ml cornoil
40g self-raising flour

3 egg whites
1/4 tsp cream of tartar
40g caster sugar


Method:
~ Combine coffee powder, rum and milk together.
~ Beat the egg yolks and sugar in a mixing bowl until bubble form and add in the oil and milk mixture. Mix well and leave aside.
~ Beat egg withes with cream of tartar until mixture forms a soft peak.
~ Gradually add in sugar, beating at high speed until frothy and stiff peaks form.
~ Gently fold in beaten egg whites into the egg yolk batter.
~ Blend well and pour into a 6" tube pan.
~ Bake at preheated oven at 170'C for 30 minutes.
~ Remove from oven and invert cake immediately until completely cool.


Double the portion if you want to make a bigger one.
I've used a 7" tube pan and that's why my cake looks a little short...:p
If you are a coffee and rum lover, I'm sure you'll like this.


Not very well cut while removing from the pan, I think I need a better and sharp knife for chiffon cake. The one I'm using is too blunt..:(


Hope you'll like this!
Cheers!!

Thursday, June 28, 2012

Cakes for him.....Pandan Layered Cake & Tiramisu

It was my husband's birthday 2 days ago, and we had a great celebrations on his big day. I've made 2 different birthday cakes for him...one "Pandan Layered Cake" for the family celebration in the morning and another "Tiramisu" to celebrate with his friends at night. Both cake were well received and they were gone on the day itself..:)

First, the Pandan Layered Cake. It was my first attempt and I had a good praise by my hubby. He loves the cake and took 2 big pieces right away. It was not that difficult as I thought though...^^

 The recipe:
(A)
2 egg yolks
60g cake flour
35g sugar
1/4 tsp salt
1/4 pandan essence
1/2 tsp baking powder
40ml thick coconut milk
1/4 cup corn oil

(B)
2 egg whites
35g sugar
1/4 tsp cream of tartar

(C)
500g thick coconut milk
35g brown sugar
1/4 tsp salt
1/2 egg
50g Hun Kwee flour
1 tsp agar agar powder

~ Cook till thicken!

Method:
~ Mix ingredients (A) together with a whisk and keep aside.
~ Beat ingredients (B) till fluffy and firm.
~ Gently fold in (B) into (A). Mix well.
~ Bake in and ungreased 7" round tin at 180'C for 25-30 minutes.
~ Sliced cake into 3 to 4 layers and topping each layer with hot frosting (C)
~ Cover the whole cake with the hot frosting (C) and sprinkle with some desiccated coconut.
~ Chilled the cake before serving.

I didn't do a good job slicing the cake properly. So you can see the thickness of each cake was uneven here.
Anyway, he didn't notice that...LOL!!

Then I was told that he'll be celebrating with his friends at night too. Without any hesitation, a Tiramisu was the most simple one to bake...hehe! So the cake was completed in 2 hours time and I'm off to the hair saloon to beautify myself for the night...hahaha!!!
If you like this Tiramisu, please refer to my older post here.

Cheers!!

Friday, May 4, 2012

Let's Celebrate!!


It's my friend's son's 2nd birthday, and I'm so glad that I have the chance to bake him some cakes!
I actually have this opportunity to bake him birthday cakes since he was born..how lucky I am!!Yes...I've baked him 3 times birthday cakes and I admit only the 2nd and the last one were nice...;p

Here's the 1st one....a Chocolate Hazelnut Butter Cake. A not so nice cake which is alittle dry and the piping...oh dear...it was so ugly! When I was doing this I was so frustrated and feel like throwing the cake away...LOL!! Since it was not that nice, so I'm not posting the recipe here.
Anyway the cream was wonderful! I've made this Swiss Meringue Buttercream for the piping which was strongly recomended by dear Wendy (table for 2). Thanks Wendy!!


 Have a look at the cake...it was rough and dry..:(
I'll make some changes when I bake this again, and I'll definitely with share the recipe if it's good.

 The 2nd one...some Valrhona Chocolate cupcakes for him to celebrate with his school mates.
Not much decorations, just some fondant animals cut out from my cookie cutters..:)

 These were well received by his teachers and friends!! I'm glad with that..^^

 The 3rd...this was GOOD!! This was made for his actual birthday which we celebrated at his house. Everybody likes it so much and I'm so happy with all the compliments.
It's a Valrhona Chocolate sponge + Plain yogurt sponge cake sandwiched with fresh strawberry cream and a very very simple decoration!

 For the sponges recipe, please refer to my old sponge cakes recipes. I just twist and turn the recipe and added different kind of flavours in it.
I've blended some fresh strawberries and added into the dairy whipping cream for the cake. Then covered the whole cake with the plain whipped cream.

 It was 5 layers and alittle too tall...haha! So the cake was brought to his house without any boxes...;p
Soft sponges with not so sweet texture...yummy!!

 Have a look inside the cake, don't it look soft and fluffy?.....^^
I'll make this again for my daughter coming birthday, hope she won't complain why there's no castle or princess on the cake this year...hehehe!

 I actually wanted to make a nice fondant cake for his 3rd celebration, but my friend said she prefered a simple sponge cake instead. So this cake were made by her request.

Happy Birthday Royden!!

Friday, November 18, 2011

White Wine Cheese Cake

A special cheese cake for a special friend!! This was bake a day before the celebration, and I has been cracking my head for what cake to bake for my dear friend for her early birthday celebration. Then she requested a cake with alcohol...hmm, tiramisu? No no...not again! Then when I was searching through my recipe books, this cake just came to my mind! Yes!! a wine cake!!
I've baked this cake more than a decades ago for my dear vocal teacher, which I remembered that his comment was "GOOD"!!! So I've decided to bake this for the birthday gal...:)

Got a good quality white wine from the store nearby and got some fresh rapsberries for decoration. Well, not much decoration here, and I don't think a rich wine cheese cake will go well with cream or chocolate. So, lets just made it simple!

This recipe was actually founded from the web long time ago. (really more than a decade)
Here comes the recipe....

200g digestive biscuits
100g butter (melted)

~ Wrapped the 9" round ring pan with aluminium foil.
~ Crushed the biscuits and mix well with melted butter and press it formly onto a 9" round ring pan.
~ Leave it aside while prepare the cheese fillings.

500g cream cheese
2 eggs
90g sugar
2/3 cup plain yogurt
1&1/3 cup white wine (get the best one)
2 tbsps cake flour

~ Cream the cheese and sugar till light.
~ Add in eggs one at a time. Blend well.
~ Add in yougurt and wine and mix well then fold in the flour.
~ Pour into prepared tin with the biscuits base.
~ Bake at 170'C for 60-65 minutes. Remove from oven and let cool before chilling in the fridge overnight.
~ Remove from pan and decorate as desire.

The texture was really rich and if you like wine, this is the recipe you must try. Trust me, you'll love it!! So what are you waiting for, this is best to serve during X'mas gatherings after your turkey meals...hehe!


Cheers!!

Friday, October 7, 2011

Orange Cocoa Marble Chiffon

Crazy with cooking and baking lately, I find this is the way to destress. (except the washing part la)...haha! Everyday without fail I have to do at least 2 hours revision (morning & night) with my daughter for her coming exams, and make sure she understand everything. That's why I feel so stress and tired! My husband said I'm too hard on her that she's only Std-1, but I just cannot help it...;p Its not that I want her to score all 100% for me, but at least she must know the important of examinations and also her attitude of learning.
Well, since its another weekend, I let go alittle today, cooked her favourite dinner and a cake for her breakfast tomorrow. (Anyway, she took a big piece before she went to bed...haha!)


An Orange chiffon but played with some cocoa powder for the marble effect. The effect turns out quite nice and I'm satisfied with it. (not to mention about the texture and taste...its super soft!) This was actually inspired my Ann from Anncoo Journal's Orange Chocolate Cake. Hers turn out so beautiful and I was wishing mine turns out like hers before baking. Somehow, it was a big difference...;p

Again this recipe was adapted from Kevin Chai's (Chiffon cake is done) Orange Chiffon Cake. I just changed alittle here by adding the cocoa powder.

Here's my version....

Egg yolk batter:
7 egg yolks
40g sugar
4 tbsps corn oil
1 tbsp orange rind
60ml orange juice
110g self raising flour

** 2 tsp cocoa powder

Egg white foam:
7 egg whites
1/2 tsp cream of tartar
120g sugar

Method:
~ Beat egg yolks and sugar until blubbly, add in oil, orange juice, orange rind and mix well.
~ Add in flour and mix well until forms a batter. Divide into 2 equal portions. Keep aside.
~ Add in 2 tsps cocoa powder in one of the egg yolk batter, mix well and keep aside.
~ Whisk egg white and cream of tartar until forms soft peak, add in sugar gradually and beat at high speed until stiff peak forms.
~ Divide egg white foam into 2 portions and add into the egg yolks batter separately.
~ Spoon into a 9" tube pan by sequence. Gently shake the pan alittle to even the top.
~ Bake at 170'C for 40 minutes. Invert pan immediately and let cool before slicing.

I can't resist myself, and took a big piece right after cutting it. Hopefully I don't take another piece after finish posting this....LOL!!


Have a great weekend.....CHEERS!!

LinkWithin

Related Posts with Thumbnails